Spring : IoC(Inversion of Control) 예제
IoC(Inversion of Control) 예제
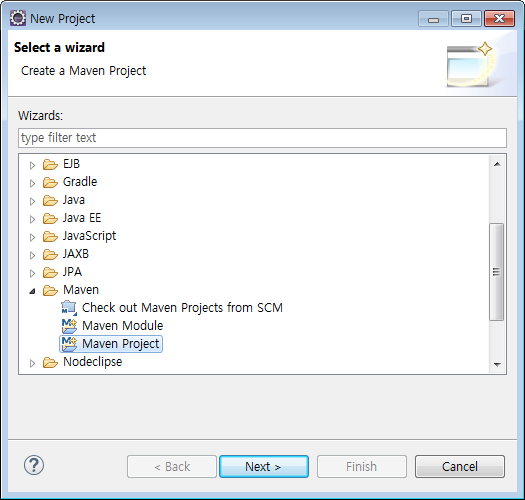
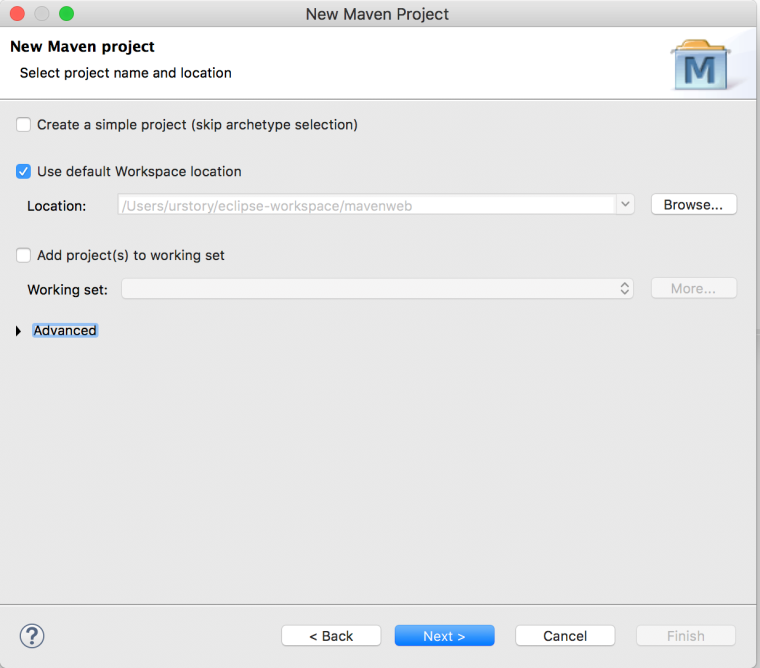
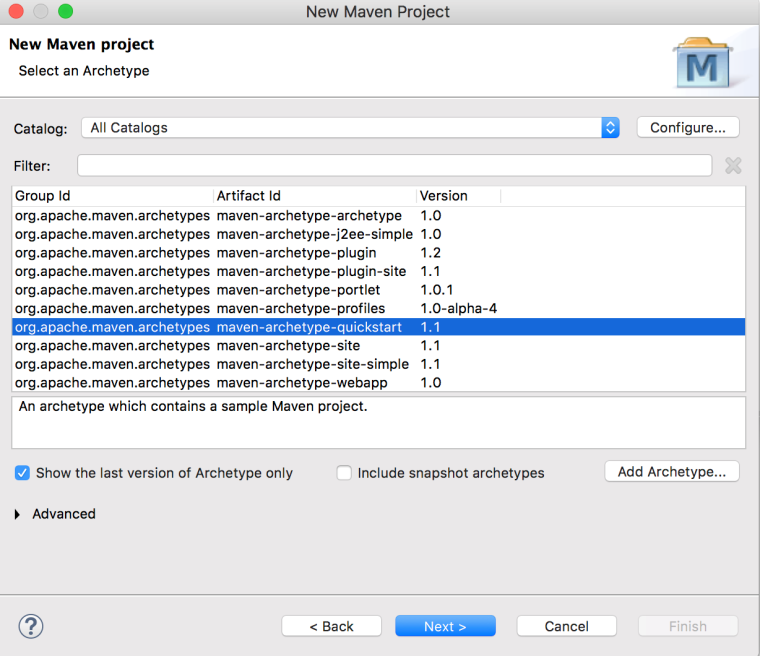
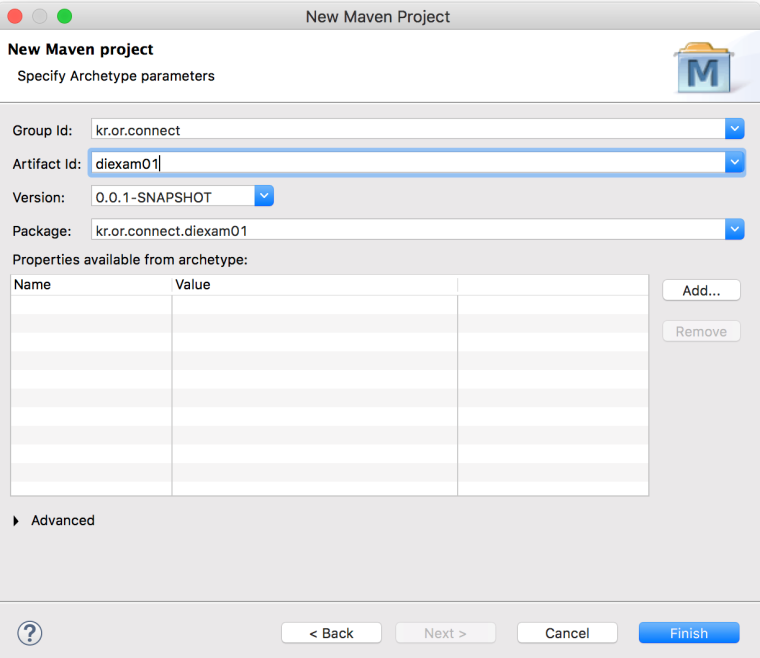
Maven으로 Java프로젝트 만들기
pom.xml 파일에 JDK를 사용하기 위한 플러그인 설정을 추가합니다.
<project xmlns="http://maven.apache.org/POM/4.0.0" xmlns:xsi="http://www.w3.org/2001/XMLSchema-instance"
  xsi:schemaLocation="http://maven.apache.org/POM/4.0.0 http://maven.apache.org/xsd/maven-4.0.0.xsd">
  <modelVersion>4.0.0</modelVersion>

  <groupId>kr.or.connect</groupId>
  <artifactId>diexam01</artifactId>
  <version>0.0.1-SNAPSHOT</version>
  <packaging>jar</packaging>

  <name>diexam01</name>
  <url>http://maven.apache.org</url>

  <properties>
    <project.build.sourceEncoding>UTF-8</project.build.sourceEncoding>
  </properties>

  <dependencies>
    <dependency>
      <groupId>junit</groupId>
      <artifactId>junit</artifactId>
      <version>3.8.1</version>
      <scope>test</scope>
    </dependency>
  </dependencies>

-------------------------------------추가----------------------------------------------------
  <build>
     <plugins>
        <plugin>
            <groupId>org.apache.maven.plugins</groupId>
            <artifactId>maven-compiler-plugin</artifactId>
            <version>3.6.1</version>
            <configuration>
                <source>1.8</source>
                <target>1.8</target>
            </configuration>
        </plugin>
    </plugins>
  </build>
----------------------------------------------------------------------------------------------

</project>
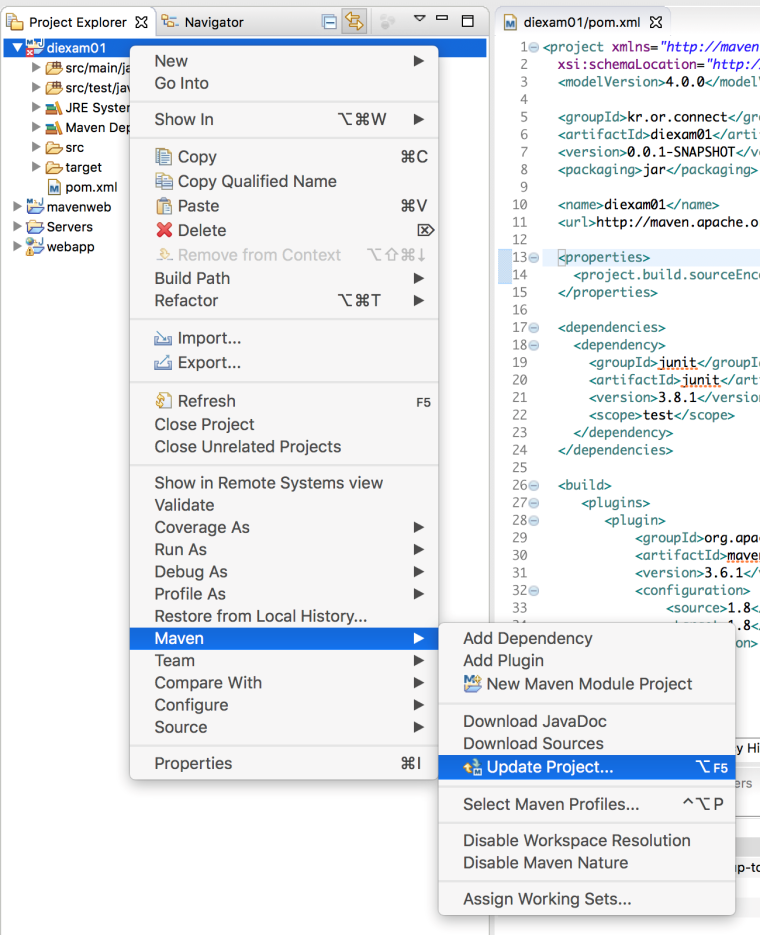
프로젝트를 선택하고, Maven -> Update Project를 선택합니다.
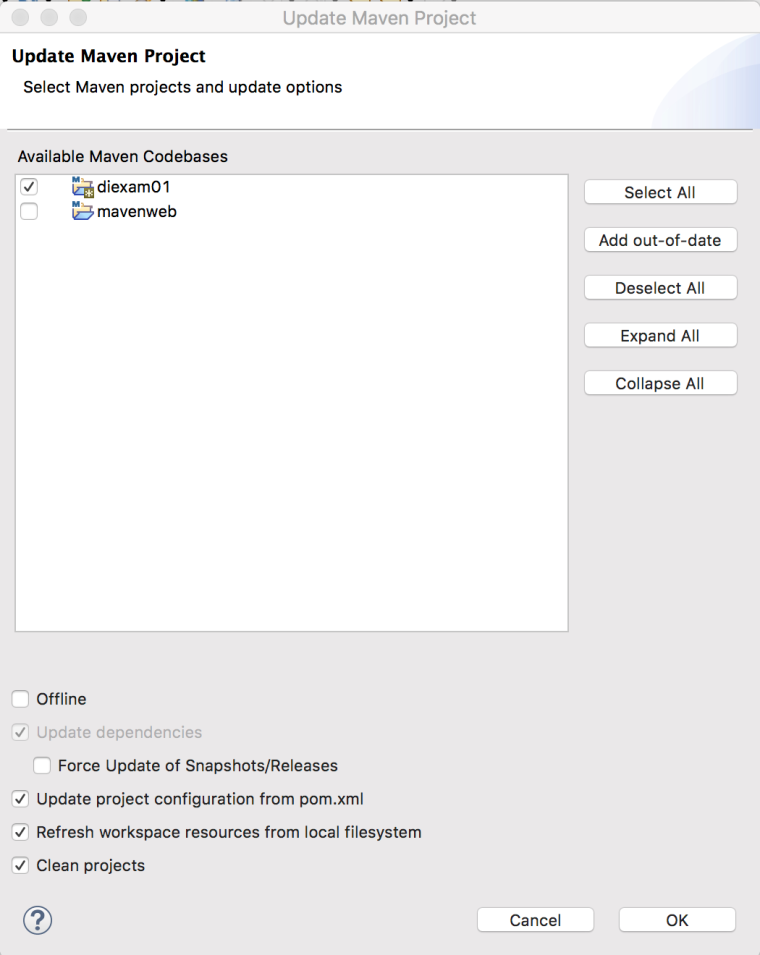
아래와 같은 창이 뜨면 OK버튼을 클릭합니다.
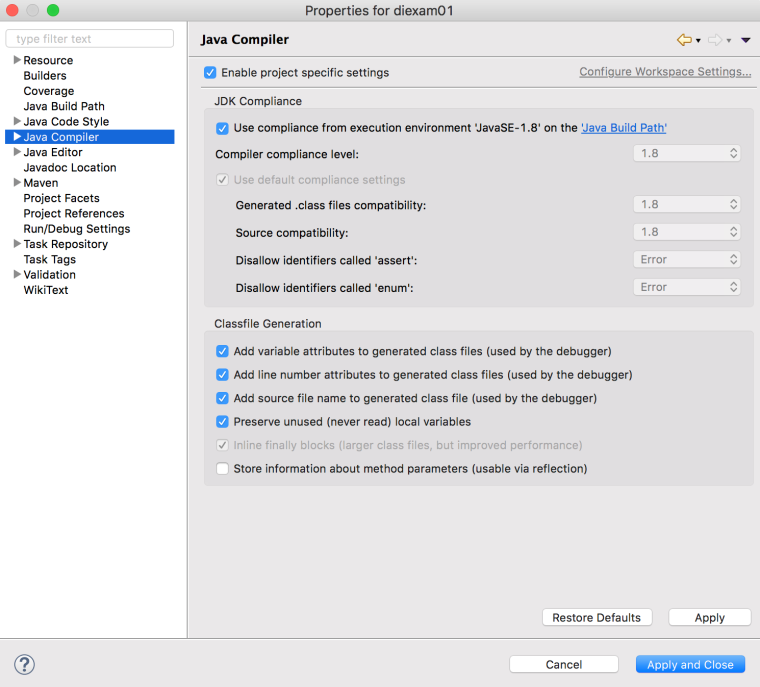
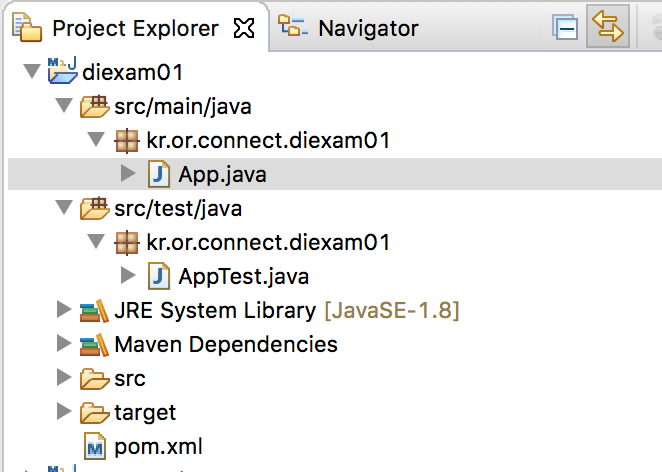
버전이 1.8로 바뀌어 있는 것을 볼 수 있습니다. (만약 바뀌지 않았다면 pom.xml의 properties 부분을 확인해서 버전을 바꿔주세요.)
코드작성하기
App.java
기본적으로 만들어져 있는 파일로 “Hello World”를 볼 수 있습니다.
package kr.or.connect.diexam01;

/**
 * Hello world!
 *
 */
public class App
{
    public static void main( String[] args )
    {
        System.out.println( "Hello World!" );
    }
}
AppTest.java
JUnit Test를 할 수 있는 파일입니다.
package kr.or.connect.diexam01;

import junit.framework.Test;
import junit.framework.TestCase;
import junit.framework.TestSuite;

/**
 * Unit test for simple App.
 */
public class AppTest
    extends TestCase
{
    /**
     * Create the test case
     *
     * @param testName name of the test case
     */
    public AppTest( String testName )
    {
        super( testName );
    }

    /**
     * @return the suite of tests being tested
     */
    public static Test suite()
    {
        return new TestSuite( AppTest.class );
    }

    /**
     * Rigourous Test :-)
     */
    public void testApp()
    {
        assertTrue( true );
    }
}
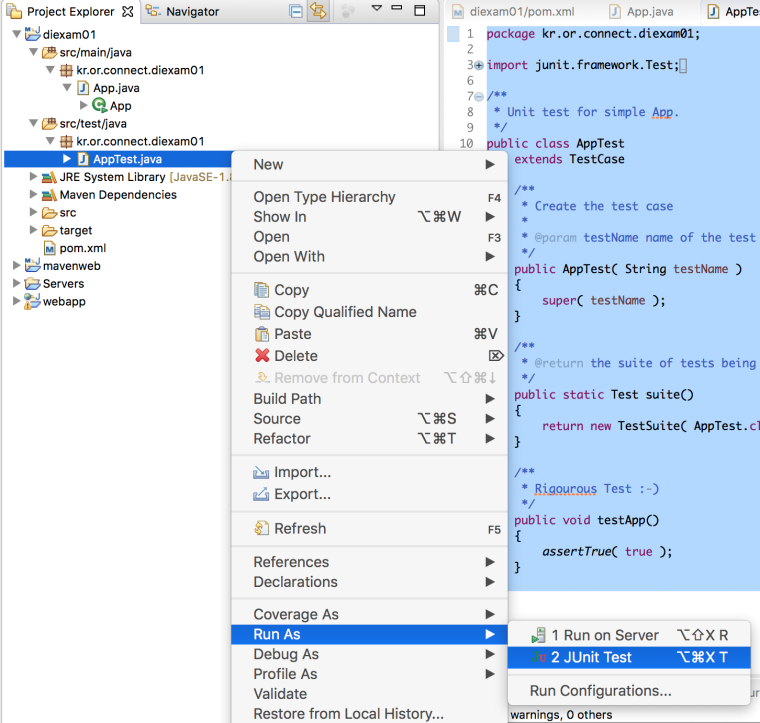
AppTest.java 를 선택한 후 우측버튼을 클릭하고 Run As -> JUnit Test 메뉴를 선택합니다.
하단의 JUnit 뷰에 하나의 테스트가 성공했다는 메시지와 함께 녹색 막대가 보여집니다.
Bean class
예전에는 Visual 한 컴포넌트를 Bean이라고 불렀지만, 근래 들어서는 일반적인 Java클래스를 Bean클래스라고 보통 말합니다.
Bean클래스의 3가지 특징은 다음과 같습니다.
- 기본생성자를 가지고 있습니다.
- 필드는 private하게 선언합니다.
- getter, setter 메소드를 가집니다.
- getName() setName() 메소드를 name
프로퍼티(property)라고 합니다. (용어 중요)
UserBean.java
package kr.or.connect.diexam01;

//Bean 클래스
public class UserBean {

	//필드는 private한다.
	private String name;
	private int age;
	private boolean male;

	//기본생성자를 반드시 가지고 있어야 한다.
	public UserBean() {
	}

	public UserBean(String name, int age, boolean male) {
		this.name = name;
		this.age = age;
		this.male = male;
	}

	// setter, getter메소드는 프로퍼티라고 한다.
	public void setName(String name) {
		this.name = name;
	}

	public String getName() {
		return name;
	}

	public int getAge() {
		return age;
	}

	public void setAge(int age) {
		this.age = age;
	}

	public boolean isMale() {
		return male;
	}

	public void setMale(boolean male) {
		this.male = male;
	}

}
Spring Bean Factory를 이용하여 Bean객체 이용하기
- pom.xml에 Spring dependency와 properties를 추가해줍니다.
<project xmlns="http://maven.apache.org/POM/4.0.0" xmlns:xsi="http://www.w3.org/2001/XMLSchema-instance"
  xsi:schemaLocation="http://maven.apache.org/POM/4.0.0 http://maven.apache.org/xsd/maven-4.0.0.xsd">
  <modelVersion>4.0.0</modelVersion>

  <groupId>kr.or.connect</groupId>
  <artifactId>diexam01</artifactId>
  <version>0.0.1-SNAPSHOT</version>
  <packaging>jar</packaging>

  <name>diexam01</name>
  <url>http://maven.apache.org</url>

  <properties>
    <project.build.sourceEncoding>UTF-8</project.build.sourceEncoding>
    <spring.version> 4.3.14.RELEASE</spring.version>
  </properties>
  <!-- properties에 있는 것은 pom.xml안에서 상수처럼 사용할 수 있습니다.  -->

  <dependencies>
	<!-- Spring -->
	<dependency>
		<groupId>org.springframework</groupId>
		<artifactId>spring-context</artifactId>
		<version>${spring.version}</version>
        <!-- properties에  'spring.version'값을 가져옵니다 -->
	</dependency>


    <dependency>
      <groupId>junit</groupId>
      <artifactId>junit</artifactId>
      <version>3.8.1</version>
      <scope>test</scope>
    </dependency>
  </dependencies>

  <build>
     <plugins>
        <plugin>
            <groupId>org.apache.maven.plugins</groupId>
            <artifactId>maven-compiler-plugin</artifactId>
            <version>3.6.1</version>
            <configuration>
                <source>1.8</source>
                <target>1.8</target>
            </configuration>
        </plugin>
    </plugins>
  </build>
</project>
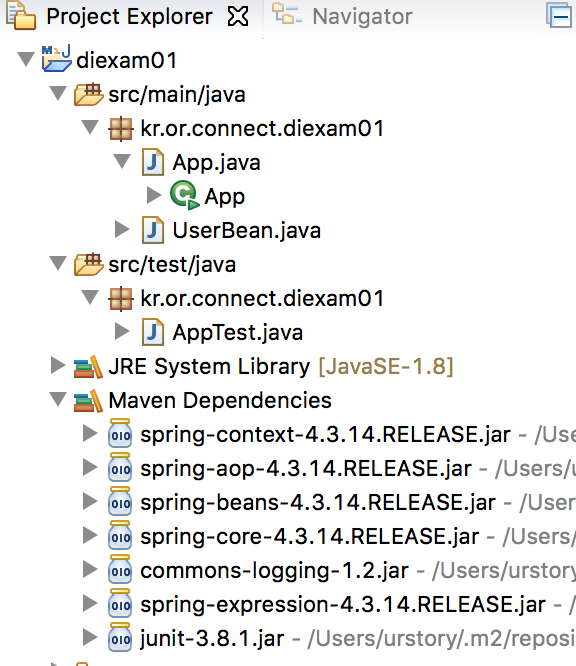
- 추가된 라이브러리 확인합니다.
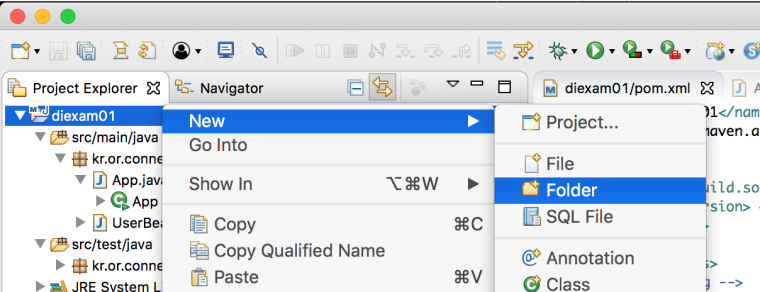
- src/main 폴더에 resources 소스 폴더를 생성합니다.
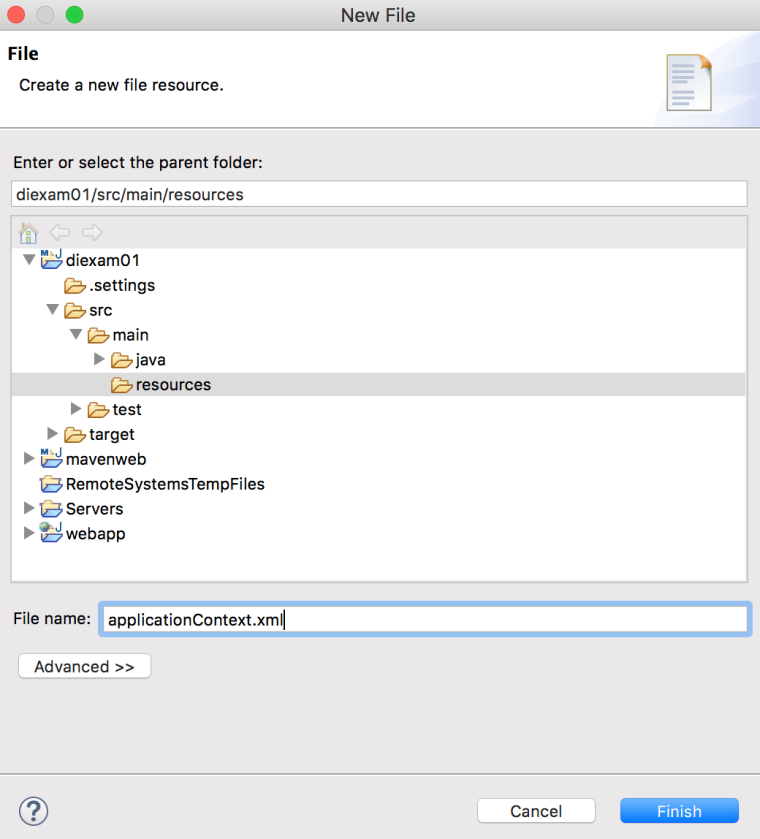
src/main/resources 폴더에 applicationContext.xml 을 생성합니다.
applicationContext.xml
<?xml version="1.0" encoding="UTF-8"?>
<!-- beans는 root element입니다. -->
<!-- xml파일로 Spring설정 파일을 만들게 되면 가장 바깥쪽 태그를 root element라고 합니다. -->
<beans xmlns="http://www.springframework.org/schema/beans"
	xmlns:xsi="http://www.w3.org/2001/XMLSchema-instance"
	xsi:schemaLocation="http://www.springframework.org/schema/beans http://www.springframework.org/schema/beans/spring-beans.xsd">

	<bean id="userBean" class="kr.or.connect.diexam01.UserBean"></bean>
	<!-- "kr.or.connect.diexam01.UserBean" 경로에 있는 객체를 "userBean"이라는 id로 만들어줍니다. -->

</beans>
bean 태그를 하나 입력했는데, 위의 태그는 다음과 같은 의미를 가집니다.
UserBean userBean = new UserBean();
ApplicationContext.xml를 이용해서 설정파일을 읽어들여 실행하기
package kr.or.connect.diexam01;

import org.springframework.context.ApplicationContext;
import org.springframework.context.support.ClassPathXmlApplicationContext;

public class ApplicationContextExam01 {
	public static void main(String[] args) {
		ApplicationContext ac = new ClassPathXmlApplicationContext("classpath:applicationContext.xml");

		System.out.println("초기화 완료!!");

		UserBean userBean = (UserBean)ac.getBean("userBean");
		// Bean Factory에서 id값을 이용해 객체를 가져옵니다.
		userBean.setName("Splin");

		System.out.println(userBean.getName());

		UserBean userBean2 = (UserBean)ac.getBean("userBean");

		if(userBean == userBean2)
			System.out.println("같은 인스턴스입니다.");
		// 싱글톤 패턴을 사용하기 때문에 같은 객체라는 것을 알 수있습니다.
	}
}
ApplicationContext 인터페이스를 구현하는 ClassPathXmlApplicationContext를 이용해 생성자 파라미터로 지정된 설정 파일(classpath:applicationContext.xml)을 읽어Bean Factory를 만든 후, 그 안에 선언된 Bean들을 모두 메모리에 올려줍니다. (이 때 문제가 발생하게되면 해당 어플리케이션은 종료됩니다.)
resources 폴더에서 생성한 xml은 자동으로 classpath로 지정이 됩니다. (Java 폴더에서 만들어진 클래스와 마찬가지로 Bean으로 생성되어 있습니다.)
이렇게 객체를 대신 생성해주고 싱글턴으로 관리해주는 기능들이 IoC(제어의 역전)이라고 합니다.
참고 : https://www.boostcourse.org/web326/lecture/258525/?isDesc=false



댓글남기기